Tuesday, February 19, 2013

Snickerdoodles {Gluten-Free!}

Ah, snickerdoodles, one of my favorite cookies, but alas I have not been able to enjoy them in the last year due to going gluten-free. I did find a gf recipe but for some reason didn't want to try it. So, since I was off this afternoon with my kids, we thought we would try making both the regular and a gf version. Verdict is: you can't really tell the difference! Can you?


The only visible difference was that the gluten-free variety did not get the signature "cracks" on the tops. Now, don't try the gf dough though- yuck! But once it is baked- yum!

Gluten Free Snickerdoodles (based on this recipe, remember to use as many organic ingredients as possible)

3/4 c granulated sugar
2/3 c light brown sugar
1/2 c butter, softened
 2 tsp vanilla
 2 eggs
 1 1/2 c Bob's Red Mill gluten-free all-purpose flour
 2 tsp baking powder
 2 tsp xanthum gum
 dash of cinnamon

To roll dough in:
1/3 c  granulated sugar
2 tsp cinnamon

Cream together both sugars and butter. Add egg and vanilla and beat well.

Combine dry ingredients with whisk, add to sugar mixture and stir until just combined.

Preheat oven to 400 degrees.

Use tablespoon to scoop dough, roll into ball and then roll in sugar/cinnamon mixture and place on baking sheet. Bake 10-14 minutes, cool on rack. Makes 30-32 cookies.
 
Gluten-free version on the top right corner of the picture.

Monday, February 18, 2013

Hard-Boiled Eggs {and how to peel them!}


I have been eating a hard-boiled egg each day on my salad for the last year. I used to think it was gross but now I love it! What I haven't loved is peeling the eggs. Ugh! I have tried salting the water, cooling them slightly and peeling right away. I even tried putting coconut oil in the water to see if that would help them to peel better, but no!

And then, due to sheer procrastination (ahem), I found what works. Now, keep in mind these are farm fresh eggs, and have only been out of the coop for 1-2 weeks, not the month that it takes to get from factory farms to the grocery store. The older the egg, the easier the peel so that is why grocery store eggs tend to peel better.

Frustration-Free Hard-Boiled Eggs

Step 1: Cover eggs with cool water in medium saucepan.
Step 2: Place on low heat until the water warms up, then you can turn up the heat (if you turn it up too fast it will crack the eggs).
Step 3: Once the water boils, cover, remove from heat and set timer for 15 minutes.
Step 4: Find something else to do for 15 minutes. I am usually whipping up a batch of chocolate chip coconut muffins.
Step 5: When timer ends, drain hot water and add a few handfuls of ice and cold water. Allow the eggs to sit and cool COMPLETELY! This is key. If you try to peel them too early they will not turn out pretty! You can wait longer than you might think (at least until all the ice is melted) and everything will be fine :)
Step 6: Crack an egg on the large end and start peeling! I usually keep the water in the pot and use it to rinse my fingers or the egg if it happens to have small pieces of shell stuck to it.
Step 7: Store the eggs in an airtight container in the fridge. I like this glass one from Pampered Chef. They keep a week for me no problem.
Step 8: Enjoy in soup, plain, on a salad, etc. Or pack them in your lunch for the week to save time!


Sunday, February 17, 2013

Adventures in Tree Tapping {First Maple Syrup Adventure}


I was so excited when our friends Wayne and Becki let us borrow a tree tap and collection bucket! We have 2 maple trees in our backyard but have never thought of tapping them to make syrup (I was under the false impression that only sugar maple trees worked). The Tap My Tree site gave a great, brief overview of how it all works.

Friday night my husband tapped the tree. By about 5 o'clock on Saturday we had not quite half a bucketful (it was probably closer to a 1/3). I poured the sap into an old coconut oil 1 gallon bucket (these things come in so handy!). With a 40-1 ratio I knew we wouldn't get much syrup with this amount of sap but wanted to try boiling it anyway and see how it went. Each picture was taken about 45 minutes apart from each other so you can see how the liquid condensed.


I can honestly say I was getting a bit disappointed by this time. The sap was still very runny and clear. Then, finally, the sap thickened to more of a syrup but it was still clear. I wasn't sure if I should take it off the heat or not, so I decided to let it on. Well, I found out what happens if you do, you get maple sugar!


Ah yes, nothing like a big ole flub to make a person humble :)  The sugar was a lot like the maple syrup leaf shaped candies you can buy and didn't taste badly at all but was definitely not syrup!

I guess the next time we'll save up our sap so we can get a bigger batch growing. And I suppose another conversation with our friends about how to boil it down wouldn't hurt, either :)

I am open for suggestions/stories/comments! Have you ever tapped trees/made syrup before? Did you ever inadvertently make candy?

Friday, February 8, 2013

Bee Keeping 101 (Finale!)


Wow! We've done it! I've made it through my first ever week-long series (yes, I know it was technically a little longer) and you've read them as fast as I could post them (and if you need to catch up on any, here's parts 1, 2, 3, 4 and 5!).

This final installment will be on the best part of beekeeping...harvesting, and ending with links to some of my favorite recipes.

Harvesting the Honey

The main nectar flow is between April and June with another (smaller) flow in the fall. Follow the pollen counts on the news/weather and when pollen is high, that is when bees are making the most honey.

Do not harvest until the honeycomb in capped. The honey has an18-20% moisture content before it is capped and it will go rancid if harvested. The bees will quickly flap their wings to dry the honey and then they know when it is at 16% moisture and then they will cap the honey. (I don't know about you but this fact amazes me!)

Smoke the bees. Pull out the frames that are capped and tap on the ground to remove bees and place in empty box away from the hive.

Take to the honey house at Brown’s Orchard ($5 to use). (Note: The floor is very sticky and it is recommended to take a sheet to lay on the floor so your feet are not stuck all the time!) Warm the caps with a heating gun or warm knife.

Put frames in centrifuge to spin the wax and honey out of the frames. The honey will then come out of a spigot at the bottom of the tub. Pour into bucket with strainer over it to catch wax and debris (such as dead bees). 

1 hive= 15 frames = approximately 5 gallons= 65 lbs (40-60 lbs is average for one hive per year and honey is heavier than water).

Allow the honey to sit in the bucket for a few days. Any impurities will float to the top and can be removed. Then store the honey in glass jars. Honey never spoils (they have even found edible honey in Egyptian tombs!) but it can crystallize.  If this happens, just put the jar in a warm water bath and it will liquefy again. Once honey crystallizes it will re-crystallize faster so you may wish to use it a.s.a.p.

You can purchase your own equipment to harvest the honey but you are looking at hundreds of dollars. There are hand crank varieties that are cheaper than electric but a lot of work! You can make the hand crank ones go with a drill, but I don’t fully understand how that all works :P

It IS legal to sell honey from your home provided you have sourced it yourself and are not selling it at any public location (market, etc.), just your home or stand.

Once you are done harvesting for the year, leave the frames out so the hive is smaller for the winter. You do need to be careful when storing used frames so that other critters do not take up residence on them and they will most likely need cleaned before usage the following year. (I need some more information on the best storage methods.)

Every 3 years get new frames as the bee’s wax absorbs pesticides from the pollen and nectar and will turn black.

Uses/Recipes

Honey is great for soothing coughs, warding off colds and I've read taking raw honey can also help reduce seasonal allergies. Personally, I take raw honey whenever I feel run down or like I may be getting sick. Add some cinnamon for extra disease-fighting power, without any horrid antibiotics (honey is a natural antibiotic)!

I've also read that raw honey on cuts and wounds can help them heal faster and without infection although I have not tried it.

Use as a sweetener in drinks and recipes instead of sugar.

Use as a spread on toast, bagels or English muffins instead of (or in addition to) butter.

Coconut Muffins/Cupcakes (I eat these almost daily!)
Chocolate Chewy Granola Bars (I love these! They are my go-to snack when I am hungry or just need something a little sweet, and oh so healthy!)

Thursday, February 7, 2013

WIAW {Friends Edition}

I hope you have enjoyed my beekeeping series! (If not, start with part 1!) Hopefully I'll have more information to add as I learn from others.

I am very blessed to have good friends who are more than willing to support my love of baking and cooking. Here's some of my recent "cooking with friends" escapades linked up at Peas and Crayons. I encourage you to go visit and find some new recipe ideas! This month is "Love your veggies" month, which you'll see in this post a little (Ok, not really too much except for some steamed broccoli. Oh well, if you have been around here long you know I LOVE my veggies already!).

My friend, Heidi, has been going through a lot lately so when she asked if I could help teach her how to bake a few recipes from my blog, I was more than happy to oblige! We made sour cream corn muffins and baked oatmeal muffins using slight variations on the recipes linked here. They turned out great, and I hear her family really enjoyed them! I also had fun getting to see her new home and her cats. I definitely miss having cats for pets. Here she is with some of the fruits of our labor:

My next fun friend food moment was when my friend and former colleague, Danette, came over for dinner. She is a big fan of salmon so I told her she had to try my new recipe! We also had wild rice with broccoli (I could eat rice and broccoli almost all the time, I love it!) and seared scallops. I had never made scallops before but they turned out really tasty! All I did was mince some garlic and put in a pan with olive oil and then sear both sides until they were done (it did take a little longer than I thought it would but the end result was definitely worth it! My apologies for the poor quality picture, my camera decided not to work for a few weeks and I had to take the picture with my phone, and then take a picture of it with my camera. Ugh, a smart phone would definitely come in handy!


Then for dessert we tried some chia pudding. She wasn't too sure about it (and quite frankly, I wasn't either as it was new to me also) but in the end it was yummy! I put chia seeds, milk, vanilla, dash of cinnamon and maple syrup in a jar and shook until blended then put in small glass dishes and put in fridge. It did not gel up quite like we wanted to I gave them a good stir and put in the freezer and then they were alright. The texture is a little unique but if you get over that, the taste is delicious! (Again, please pardon the picture quality!)


Please note that for some reason I cannot link this to the Peas and Crayons blog, the collection is closed (although it IS still Wednesday...bummer). But here is the post anyway :)

Bee Keeping 101 (Part 5)

Check out parts 1, 2, 3 and 4!

Splitting the Hive

In the spring the bees have a natural tendency to expand and they with swarm. This is not swarming to harm as seen in some movies and tv shows. 

The queen and half of the workers will leave the hive and go en masse to a location such as a tree branch or side of the house. From there, scouts will be sent to find the best location for their new home. 

Some bee keepers will have an extra hive with bait (sugar water) to attract them if they swarm. The bees tend to be very gently and can be tapped into a bucket and moved to a different hive.

You can also manually split the hive in the spring (this is especially helpful if you have lost a hive over the winter) and you want to do this before they swarm. To do this, pull 2 frames of eggs and a couple frames of honey and place in new hive. 

The new set of bees will be in turmoil for a time but the nurse bees will then feed special enzymes to babies in order to create a new queen in a very short time (sorry, I forget the exact amount!)

Protecting Your Bees

One benefit of registration with the state and also joining the local beekeepers association is notification of spraying for mosquitoes, flies, etc. 

Since bees do not fly at night, close the entrance to the hive with wire cloth (with holes too small for the bees to escape) the evening before the spray day and then re-open it the day after.

If there is any other spraying going on from companies, ask for the MSDS sheet and try to be there when they spray to encouraging spraying as little as possible.

On a personal note, you should also avoid using bug sprays and pesticides on your property and avoid planting genetically modified crops (as the pesticides and literally within the crop- including the pollen and nectar which the bees eat, as their stomachs will explode after eating).

The wire cloth is also beneficial during the winter to keep out mice from the hive. However this wire cloth needs to have holes large enough for the bees to get out in the event of a nice day but small enough that mice cannot fit inside.
 

Wednesday, February 6, 2013

Bee Keeping 101 (Part 4)

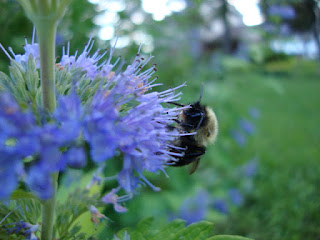
This little guy kept waving his leg at me as I took his picture :)

Have you read Part 1, Part 2 and Part 3 yet?


Equipment Needed for Hive

Sugar Water Feeder- This attaches to the entrance to the hive and is needed when starting a new hive and also if there is a stretch of rainy/cold weather as bees do not forage in the rain. If used in the spring/summer make a 1:1 mixture and for the fall a 2:1 as they need a higher sugar content to prepare the hive for winter. (They need 40-80 lbs. of honey to get them through the winter!)

Smoker- This is an essential tool to calm the bees before working the hive. Start a fire inside with pine needles, grass, tree bark, etc. and give the bees a few puffs before going into the hive.

Hive Tool- This is useful in prying apart the honey supers (as the bees will “caulk” the cracks shut with propolis in the fall) and can also be used for pulling the frames out of the honey supers.

Safety Equipment

Full-body suit for around $80 including a hat and veil that attach to the suit. You do not need to buy the full suit as they can be hot in the summer. If not using the full suit, wear a hat/veil/jacket and long heavy jeans that are tight at ankle (use Velcro or tape).

Jacket with hat and veil for around $50-60

Gloves $16-20 (you can use dishwashing gloves or latex gloves)

Other Note: When working the hive wear light colors or white. Dark colors can agitate the bees.
 
Related Posts Plugin for WordPress, Blogger...