Thursday, August 11, 2011

Snickerdoodles


I have been hankering for something with cinnamon (surprised?) and my step-son has been hankering for snickerdoodles...and I found a recipe in an old magazine, so we started out the day making a batch :)  Also made some yogurt and soft pretzels, and even tried making pretzel pockets. Tasty, but not real pretty. Check out my pretzel page to see them!

Here is the recipe taken from Cooking Light September 2007, I used all organic ingredients:

3/4 c granulated sugar
2/3 c light brown sugar
1/2 c butter, softened (I used one Earth Balance stick)
1 tsp vanilla (I'm sure I put more in than this, you know I didn't measure it out :)
1 egg
1 1/2 c all-purpose flour
1 tsp baking powder
dash of cinnamon

To roll dough in:
1/3 c  granulated sugar (although less would work fine, we had a lot left over)
1/2 tsp cinnamon (You know I didn't measure this either and most likely put more in...but it could have used more :)

Cream together both sugars and butter. Add egg and vanilla and beat well.

Combine dry ingredients with whisk, add to sugar mixture and stir until just combined.

Preheat oven to 400 degrees.

Use tablespoon to scoop dough, roll into ball and then roll in sugar/cinnamon mixture and place on baking sheet. Bake 8-12 minutes, cool on rack. Makes 30-32 cookies.


 My helper :)

Monday, August 8, 2011

My First Peck of Pickeled...Cucumbers

This was my first try at making my own pickles. I am still not 100% ready to try canning, as I still need a few supplies, so I went searching for a refrigerator pickle recipe that does not require canning and is good in the fridge for months. This is the one I settled on. In some flyers I received from the Penn State Extension on canning, it was cautioned to not alter the ingredients b/c the acidity level needs to be a certain amount in order to not have health issues. I wasn't sure if this also went for refrigerator pickles, but wasn't taking chances and only altered the spices since I didn't have them all. This made the liquid more cloudy than normal but did not really change the flavor.

Ingredients
4 pickling cucumbers cut in thin slices
1/2 medium onion (I chopped mine in my new toy)
1 cup Bragg's apple cider vinegar
3/4 cup sugar
4 1/2 teaspoons natural salt
2 teaspoons mustard seeds  (I am having trouble finding mustard seeds so I found a conversion to dry mustard and went with 4 tsp TOTAL dry mustard in the whol recipe)
1/2 teaspoon dry mustard
1/2 teaspoon turmeric  (after researching tumeric online, it looks like it is in the recipe for coloring and I did not have any so omitted it. I do have some now, though, for the next batch)
1/2 teaspoon crushed red pepper flakes  (I didn't have this either so went with the  powdered form of red pepper)
1/2 teaspoon celery seed

How to make it
Combine cucumbers, onion, vinegar, sugar, salt, mustard seeds, dry mustard, turmeric, crushed red pepper, and celery seeds; heat to boiling over high heat, stirring occasionally.

Boil 1 minute, stirring frequently.

Pour cucumber mixture into a large bowl; cool to room temperature, stirring occasionally. (This is where the cucumbers lost their bright green coloring and turn more in pickle colors. It was kind of fun to watch!)

Cover and chill overnight before serving.

You can spoon cooled cucumbers and their liquid into jars with tight-fitting lids and refrigerate up to 4 weeks. Mine went first in a 1/2 gallon Mason jar and then into a quart jar once we ate some.


Sunday, August 7, 2011

Garden Goodies and Losses

Here's the volunteer marigolds that just keep getting bigger!

 I was so sad to see my watermelon had turned brown :(

But more flowers mean maybe more babies are on their way!

Here's the small bed, doing fairly well.

I love the twisty tendrils!

So sad to see much of the corn had fallen over. Not sure if it was a bad storm we had yesterday or due to animals. A few of the stalks have been chewed on lately by rabbits and squirrels, grrrrr.

This one is looking good, though!

The story of the day was for sure the cukes!

10 of them! How exciting! Especially since the 4 I had in the fridge went soft already :(

Turned all but one into pickles and tried this mix this time to see if it pleases the family better (but I like the first recipe just fine, which I realized I haven't posted yet, so I'll try to get on that :)

It was supposed to make 4 pints, but it made 5!

Monday, August 1, 2011

New Gadgets Are Great!

The other week I attended/held my first Tupperware party ever. I wasn't sure how much I would use, since I am not all that fond of using plastic for everything. Little did I realize, they also have a lot of kitchen prep tools...and I found 2 that I would never want to be without!

First of all is the Quick Chef Pro:

This little guy will spin my salad greens/berries for me, then take out the basket and add the blades to chop (so far I have chopped onion and spinach). Then if you get the hankering for some cherry pie with homemade whipped cream, swap out the blades for the whipping paddles, add organic whipping cream, and go to work! Just add a small amount of sugar and vanilla slowly once the cream starts to peak and you are good to go! We stored ours in the base and used the handy dandy seal that comes with it and it was good for 2 days after initial whip.

I have been eating smoothies almost daily. I bought a large container of organic spinach and chopped it up, smushed it into an ice cube tray, added a little water, and froze for quick addition to my smoothies. I have found that 2 cubes per smoothie is a great amount and does not overtake the berry flavor at all!

Next is the Empanada Maker. I didn't realize when I ordered it, but it actually came with 2 in the set, so this is a great thing to share with a friend!

As soon as I saw it in the catalog I knew I had to have it to help with making "mock" tarts. I can't wait to try making empanadas, pierogies, pizza pockets, or mini apple pies as well!

Although I have significantly improved, it is still very difficult for me to roll out similar thickness, size, and shape dough. This little tool takes that variable out. All I have to do is roll out the dough. I roll out between 2 pieces of parchment paper so it doesn't stick. This is the kind I like:
Then I use the bottom of the empanada maker to cut my circle, place the dough on the maker, add the jam, close, and viola! Poptarts! Although we did think they looked more like turnovers. The other key is to make these with homemade yogurt. I have made 2 batches so far with the homemade yogurt and they have by far been the best. We ate them for breakfast when we were at Creation and they didn't even need to be toasted, where the batches made with store bought yogurt did need to be heated before eating. By using this I was also able to make twice as many tarts as normal!

Here's how they turned out (The odd shaped one is what I did to use up the last bit of dough. I think it looks like a real tart!):


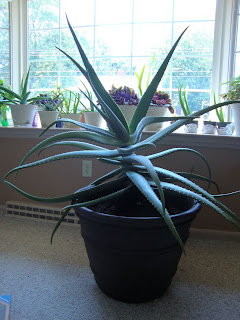
And just so my babies don't feel left out, this was yesterday's project, moving "Big Momma" as she is fondly called, from her smaller pot that she broke and tipped over into this much larger, chic one (but she keeps leaning over, ugh, I hope she makes it!). Yes, she is a monster, but I love her!

Related Posts Plugin for WordPress, Blogger...